Fixing a D-Force Pad
Feb 19, 2023
This past year, I’ve been trying to get into DDR. One thing led to another, however, and instead of getting good at dancing, I ended up dissecting my soft pad instead.
I first got into the game since it seemed like the next logical jump for me. I played a lot of Bang Dream and osu! in the past, so I felt like DDR would be another rhythm game I could easily pick up. Plus I don’t get enough exercise, so I was also planning to use this as a motivator to move around more.
The easiest way to play DDR on a PC is through StepMania, an open-source DDR clone. I downloaded it and a few song packs, and once I had gotten the hang of the game on the keyboard, I felt it was time to move to a real dance pad. Scouring the Internet, I ended up deciding on a D-Force soft pad for reasons I don’t particularly remember. After getting the pad and some head-banging with the controller settings (I didn’t realize I had to download Joy2Key to map the controller to keyboard inputs), I eventually got it connected to StepMania and was up and grooving away.
Things Fall Apart
That lasted about a month. At some point, the pad’s right button stopped responding consistently. At first, I chalked it up to my foot just missing the button (I found out I’m actually pretty bad at DDR once I started using the pad). However, after playing more maps, it slowly dawned on me that the pad was actually broken.
“Okay, maybe this one was just defective.”
I returned the pad and got it replaced. However, the next one only lasted for two weeks before the down button ran into the exact same problem. Frustrated, I rolled up my pad up into a corner and ended up quitting the game for nearly a month.
Open Pad Surgery
Eventually MLK day rolled around. Desiring the dance floor once again, I dusted off the pad and began taking it apart. My plan was simple: the D-Force pad has a matrix of 9 buttons. I’ve mapped 4 to hit arrows in the game and 1 to confirm selections. This left the remaining 4 buttons unused. If I could re-wire one of these unused buttons to the controller’s down button input, then everything would be solved!
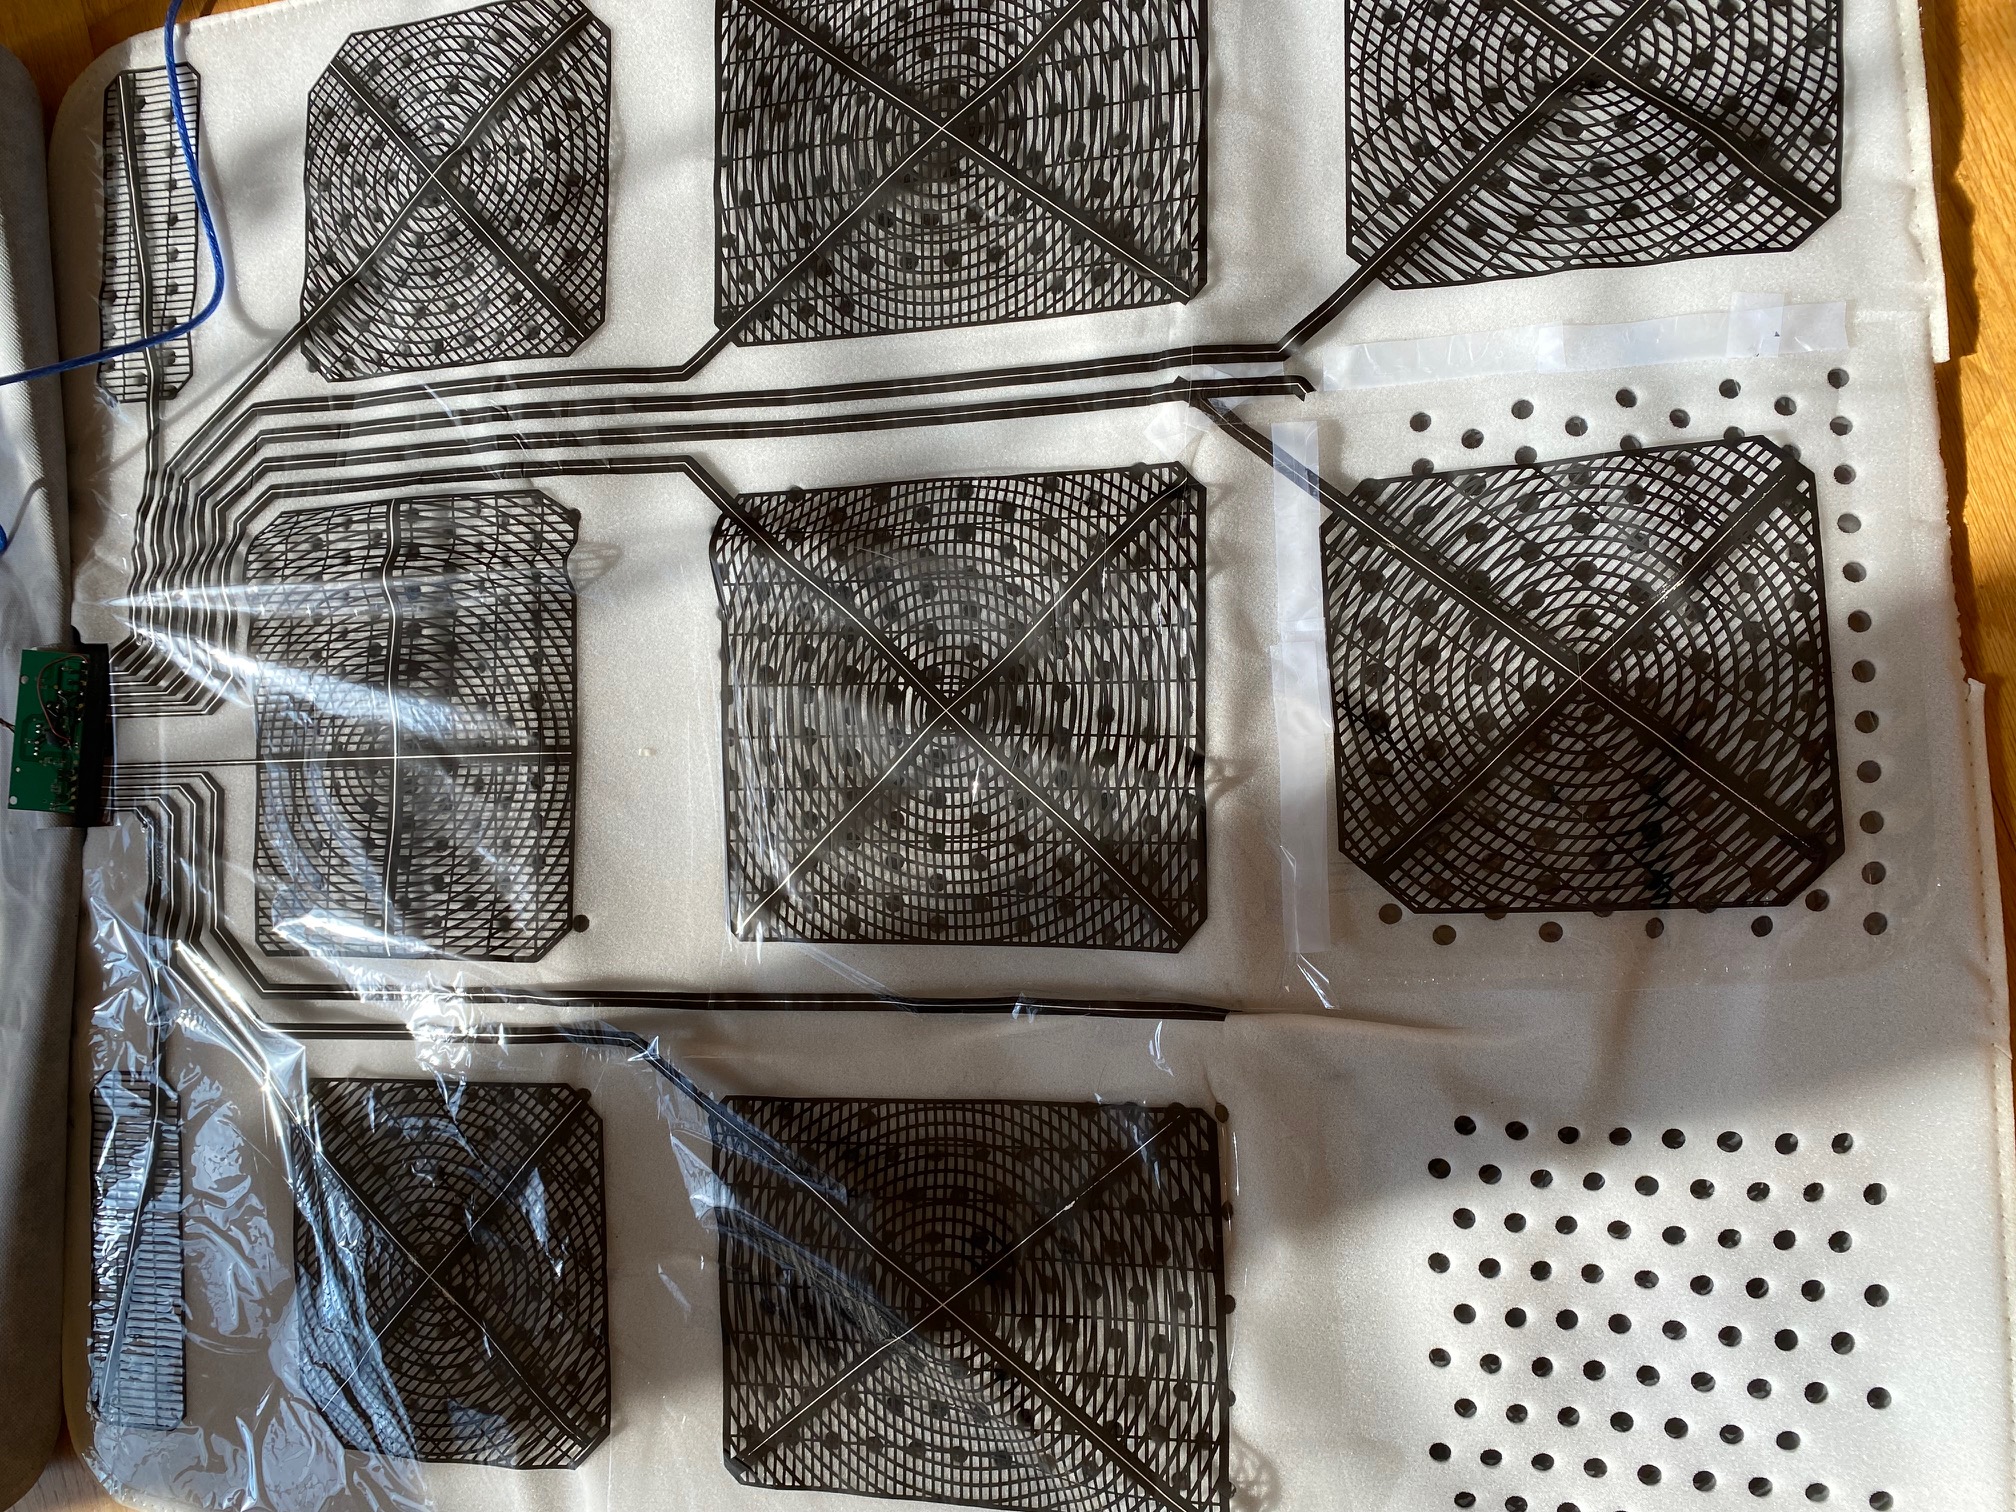
Opening up the pad, I found two plastic sheets coated with some sort of conductive paint separated by a layer of foam. The foam layer has a bunch of holes where each button is. It seems that the pad works by getting the circuits of the two layers close enough to each other in order for electricity to flow between the two sides. When I flipped the pad around, I noticed that the plastic sheet on the bottom had a crease in the bus line leading to the down button. Suspecting that this to be the cause of my woes, I grabbed some scissors and scotch tape and began the operation.
The plan was to cut out both the down button portion and the unused bottom right button portion of the plastic sheet. Then I was going to install the bottom right button as the new down button with the help of some tape and extra conductive components that I cut out.
This is what it ended up looking like, all said and done (buttons are flipped horizontally since this is the bottom sheet).
I stacked all the layers up and stapled my frankenstein pad together. Loading up a song in StepMania, I apprehensively started to play, and to my surprise, it seemed to be working.
The Relapse
Unfortunately, this time of love and joy did not last very long. Later in the night, as I was playing a longer session, the down button became unresponsive again. I removed the staples and opened up the pad once again to a new mystery.
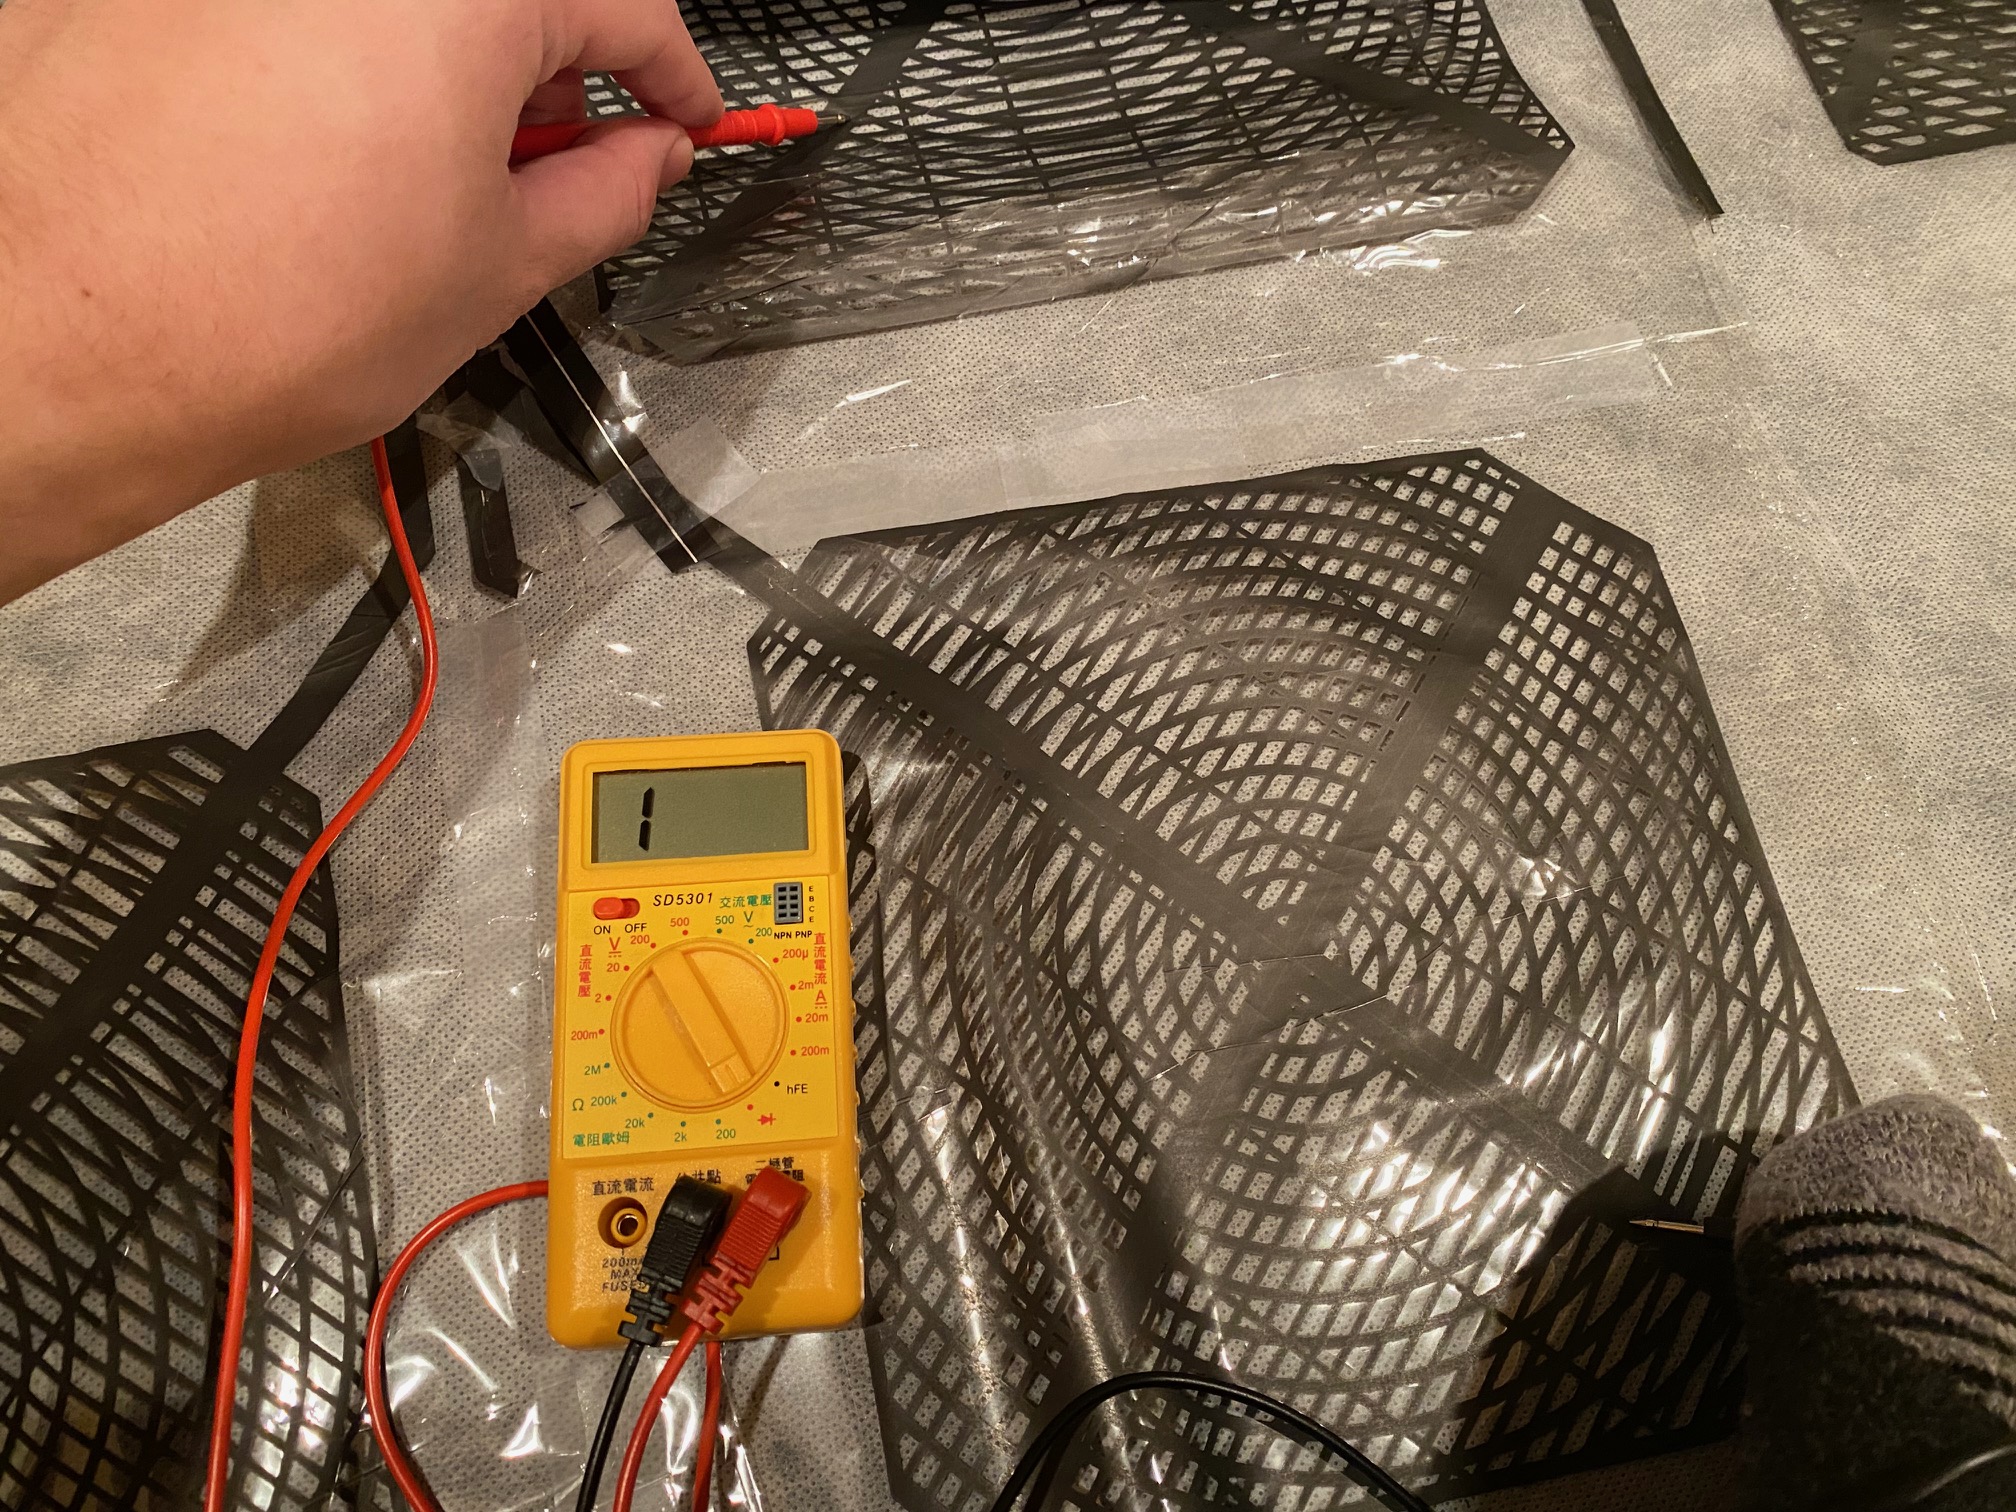
However, this time, I intended to use a more scientific method in my investigation instead of just flat intuition. I busted out my multimeter and started to measure parts of the circuit. Multimeters have a mode called “diode test” which is really useful for seeing if there is an electronic connection between two points or not. The multimeter displays a voltage drop if there is a connection, otherwise it just displays a “1” which means that the circuit is overloaded. When I pointed the terminals at the down button and its bus line, I got a 1. It seemed like my first fix did not last very long (whoops). Just as a sanity check, I also tested the connection between the down button and other buttons. Since they wouldn’t form a circuit with the multimeter, I got a 1 as expected.
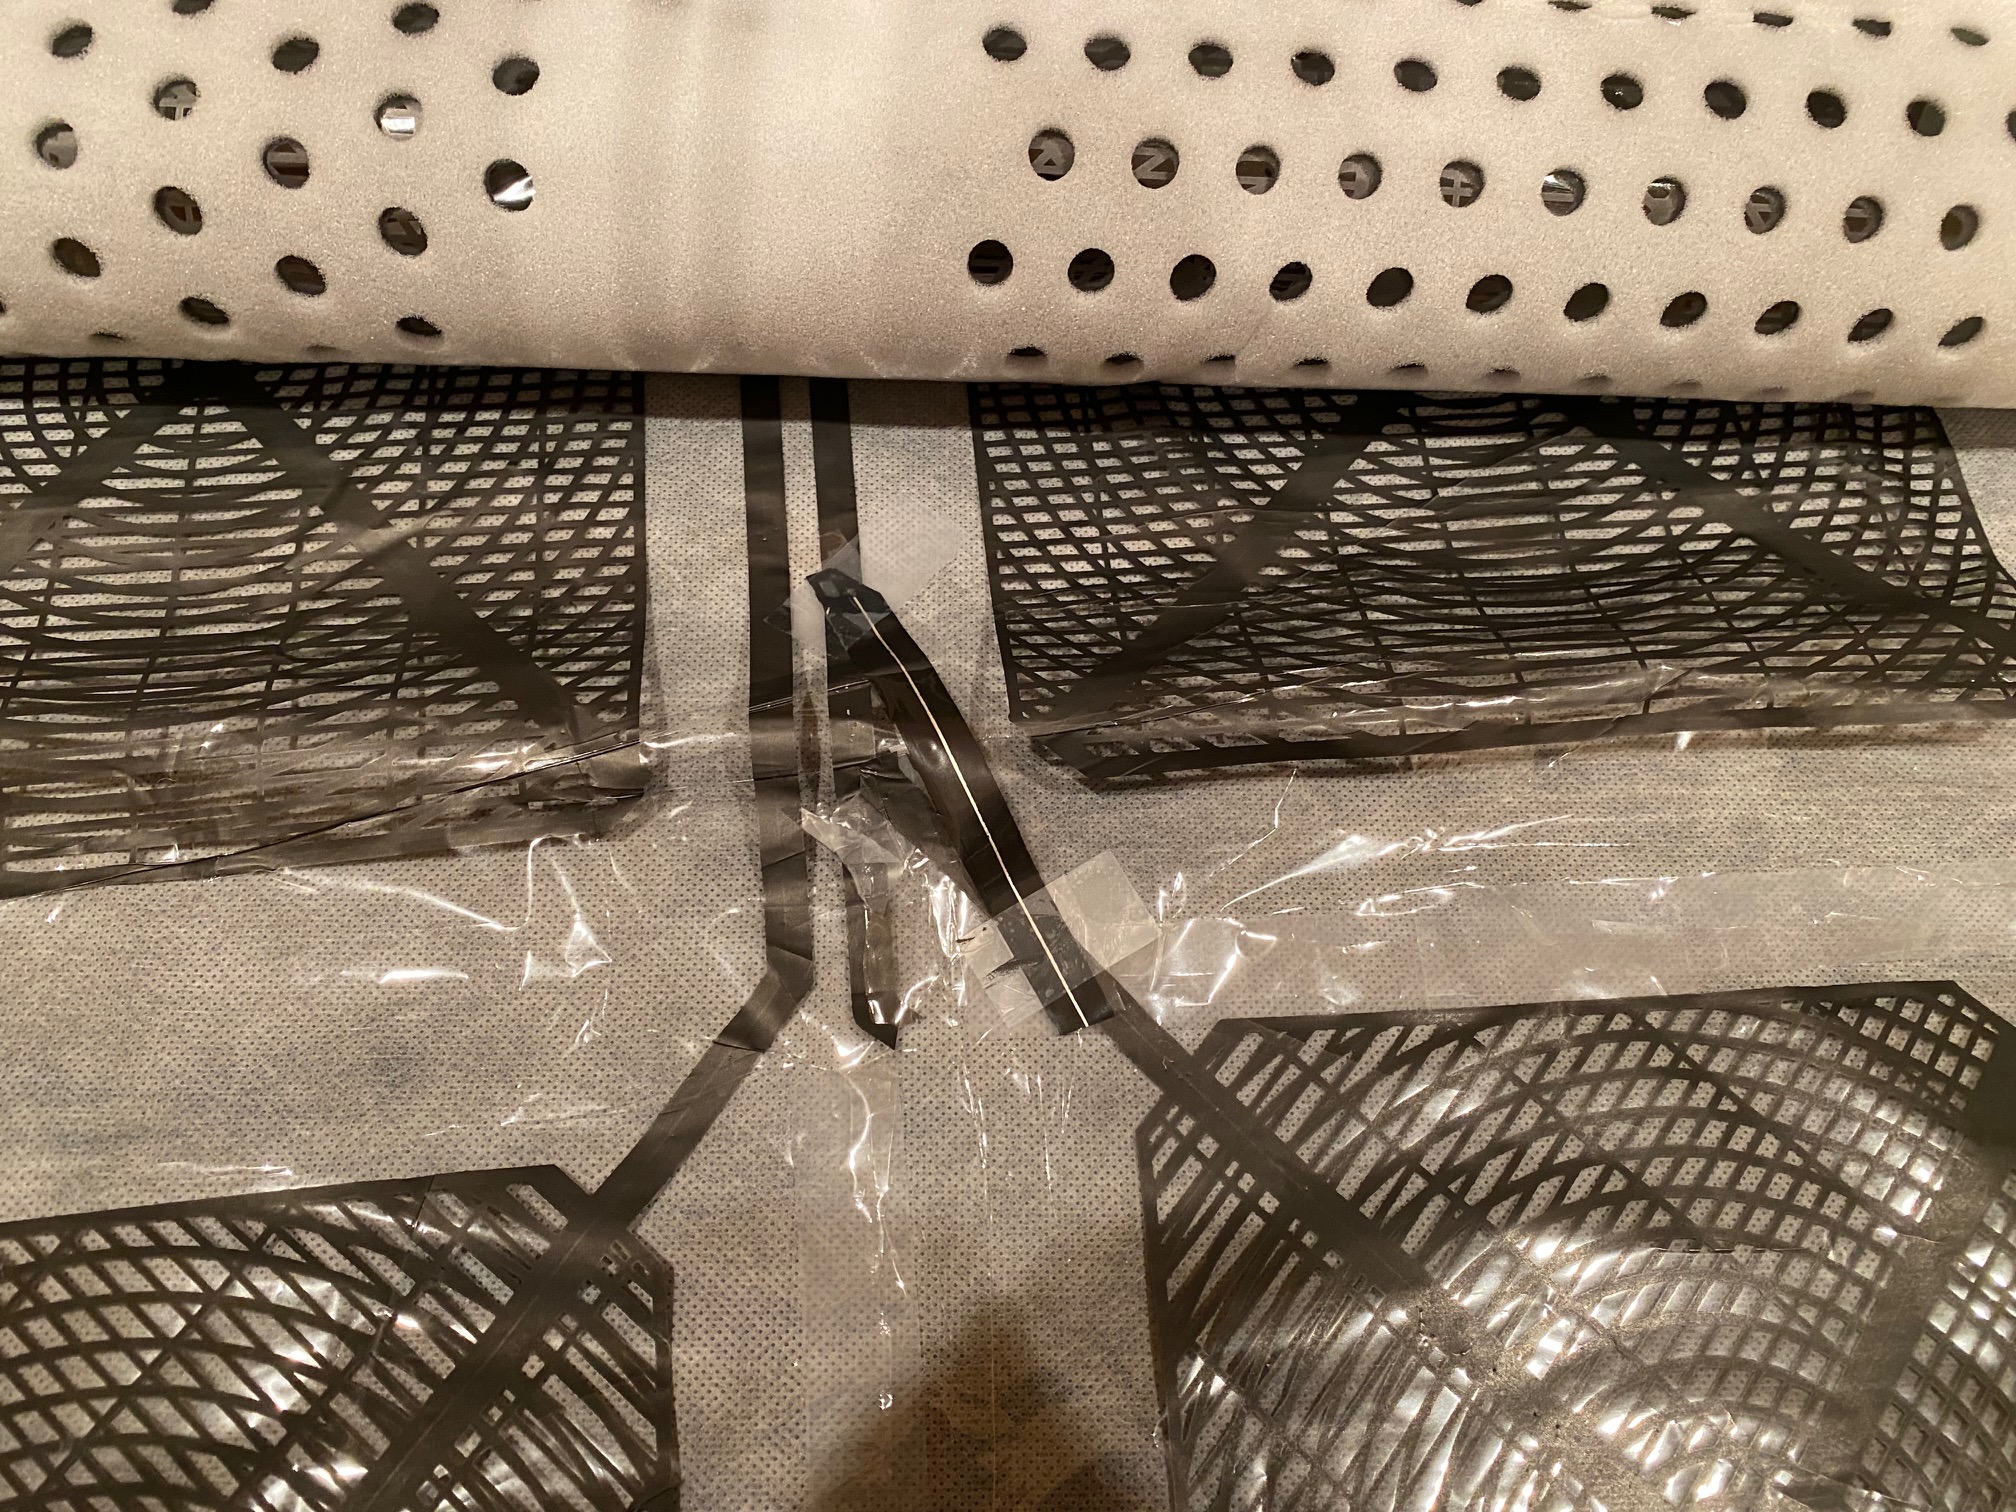
In an attempt to fix the connection, I ended up cannibalizing a larger piece of the leftover down button and attaching it higher in the down button’s bus line.
Measuring again, the voltage drop was pretty bad, but at least there’s some connection now.
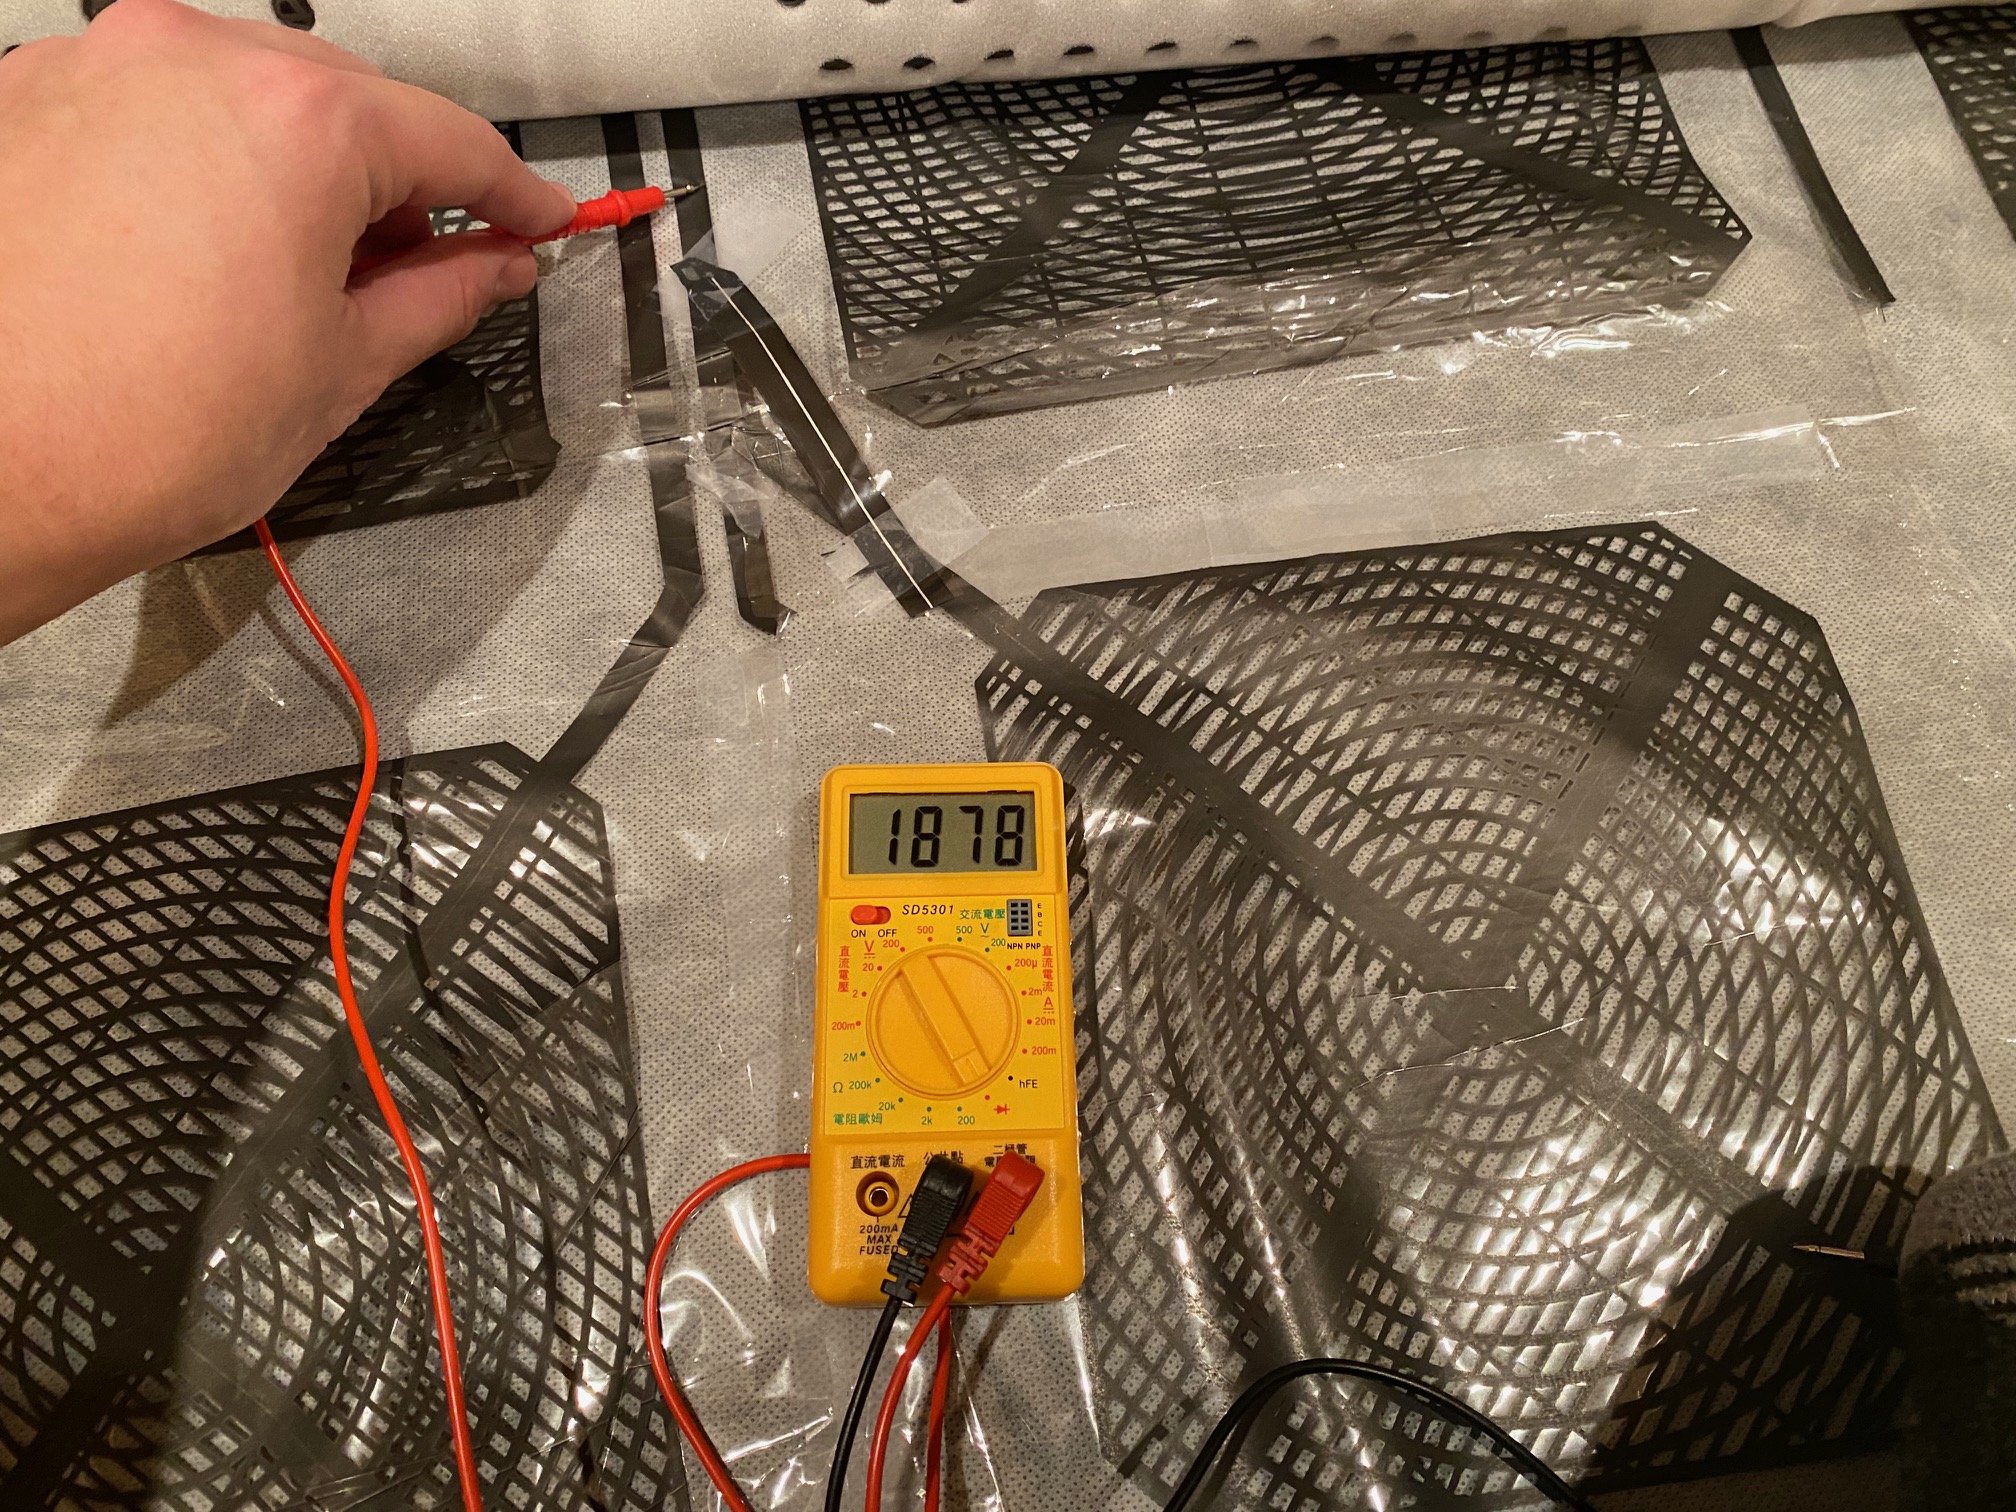
I slapped the button a few times with Joy2Key running, and it seemed responsive again, so I sandwiched the sheets back together again and returned to stomping on them for the rest of the night.
Closing Thoughts
Since then, the D-Force pad has been working quite smoothly. I suspect it will break again in the future, but at least I know how to fix it now. I still wish I had a more reliable dance pad, but basically the next upgrade I could get is a $400 hard pad from Poland. I’m not that invested into the game yet, so I figure I’ll make do with my current setup for now.
Overall, this was an interesting experience. I don’t know much about hardware, so even learning a small thing like how to use a multimeter in a practical situation feels like a big step up to me. That being said, the outcome was definitely more satisfying than the journey on this one. After all, I’ve finally fixed my pad! Now there is nothing to do but dance (or fail miserably trying to do so)!